

Table of Contents
- Why Glamping Near Cabot Trail Beats a Traditional Stay
- 9 Essential Glamping Near Cabot Trail Tips
- Tip 1: Book Early for Peak Season
- Tip 2: Understand the Different Accommodation Types
- Tip 3: Ask About Climate Control and Comfort
- Tip 4: Check What Gear and Activities Are Included
- Tip 5: Clarify Privacy and Site Layout
- Tip 6: What to Pack for Glamping in Nova Scotia
- Tip 7: Plan Your Cabot Trail Road Trip Itinerary
- Tip 8: Know the Best Time to Visit Cabot Trail
- Tip 9: Read Recent Reviews for Authentic Feedback
- Comparing Geodomes, Yurts, and Wilderness Resorts
- What to Ignore: Common Glamping Bad Advice
- Your Glamping Packing Checklist for Cape Breton
- Conclusion: Book Your Waterfront Geodome Escape
- Frequently Asked Questions
Last Updated: September 6, 2026
Why Glamping Near Cabot Trail Beats a Traditional Stay
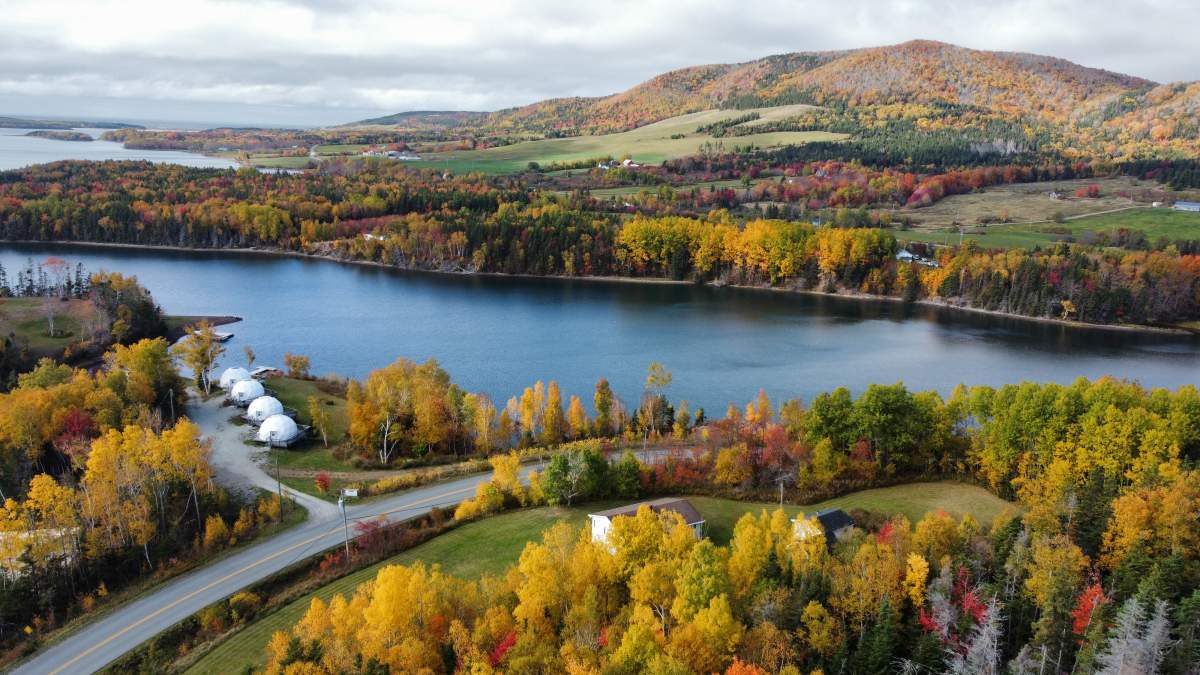
Glamping near Cabot Trail is the smart middle ground between a rugged camping trip and a conventional hotel stay, giving travelers the wilderness experience without sacrificing comfort. At Northeast Cove Geodomes, we have spent five years hosting guests who want the coastal scenery of Cape Breton with the reassurance of a real bed, a private bathroom, and climate control. The appeal is simple: you wake up to panoramic views and unspoiled beauty, then step inside to hotel-quality linens and a fully equipped kitchenette.
Most first-timers assume glamping means “camping with a nicer tent.” That assumption undersells what a modern wilderness resort can deliver. A luxury dome with a private ensuite and heating operates more like a boutique room with a massive window than like a tent. For couples seeking a romantic getaway or adventure travelers planning a Cabot Trail road trip, this blend of outdoor access and wilderness comfort is what makes the experience worth booking.
9 Essential Glamping Near Cabot Trail Tips
These nine tips cover what nobody tells you before your first stay, from booking windows to what actually matters inside the dome. Follow them and the planning process becomes straightforward instead of stressful.
Tip 1: Book Early for Peak Season
Reservation availability disappears quickly for summer and fall dates along the trail. Many properties, including smaller operations with only a handful of units, consistently fill their calendars months ahead. If the travel dates are fixed, secure the booking as soon as the schedule is confirmed rather than waiting for a better deal.
Tip 2: Understand the Different Accommodation Types
Accommodation types along the route range from geodesic domes and yurts to safari tents and tiny cabins. Domes typically offer the most space and the best weather resistance, while yurts provide a classic circular layout with fabric walls. Read the property description carefully to confirm whether the unit has a private bathroom or a shared facility, since this changes the experience significantly.
Tip 3: Ask About Climate Control and Comfort
Climate control is the detail that separates a comfortable night from a miserable one. Confirm whether the unit has active heating and cooling rather than passive insulation, and ask how the system performs in shoulder seasons. A property that genuinely stands behind its comfort will answer these questions directly.
Tip 4: Check What Gear and Activities Are Included
Some properties include kayaks, paddleboards, and bikes in the nightly rate, while others charge separately or expect guests to bring their own equipment. Confirm what is available before packing. Complimentary access to watercraft and bicycles removes the need to transport bulky camping gear and makes outdoor recreation feel effortless.
Tip 5: Clarify Privacy and Site Layout
Privacy varies widely between properties, so ask how many units exist and how they are spaced. A small operation with four domes spread across the property offers a different experience than a large resort with units within earshot of each other. For a romantic retreat, distance between units matters more than most reviews mention.
Tip 6: What to Pack for Glamping in Nova Scotia
What to pack for glamping in Nova Scotia depends on the season, but a few items are non-negotiable. Layered clothing handles the coastal temperature swings, and sturdy footwear is essential for hiking and scenic drives. Most luxury domes provide linens, towels, and kitchen basics, so leave the sleeping bags and cookware at home.
Tip 7: Plan Your Cabot Trail Road Trip Itinerary
A Cabot Trail road trip itinerary should account for drive times that are longer than they look on a map. The loop covers roughly 300 kilometers of rugged landscape with winding roads, and the scenic drive demands frequent stops for coastal scenery and photo opportunities (novascotia.ca). Build in at least two full days for the loop itself, then add a buffer day for hiking and spontaneous detours.
Tip 8: Know the Best Time to Visit Cabot Trail
The best time to visit Cabot Trail for glamping is generally late spring through early fall, when temperatures are mild and daylight hours are long (climate.weather.gc.ca). September and October deliver fewer crowds and striking autumn colors, though evening temperatures drop noticeably (parkscanada.gc.ca). Summer offers the warmest nights and the most reliable weather for kayaking and paddleboarding.
Tip 9: Read Recent Reviews for Authentic Feedback
Recent reviews reveal more than polished marketing photos ever will. Look for patterns across multiple reviews rather than fixating on a single comment, and pay attention to how the hosts respond to feedback. Consistent praise for cleanliness, comfort, and responsiveness indicates a property that takes guest experience seriously. avoiding high roaming costs.
Comparing Geodomes, Yurts, and Wilderness Resorts
The choice between a geodome, a yurt, and a full wilderness resort comes down to three questions: how much privacy you need, how much planning you want to do, and what kind of vehicle you are driving. Here is how the options actually stack up.
Geodomes: The Comfort-and-Views Pick
Geodomes are the strongest all-around choice for couples and solo travelers who want the view without the tent experience. The panoramic windows are the main event. Most domes in the region include a private ensuite, climate control, and a kitchenette, which means you are self-sufficient and do not need to plan around resort meal times.
The trade-offs: Premium pricing compared to yurts, and a smaller overall footprint than a cabin. You are also trading the social atmosphere of a resort for seclusion. If you want to meet other travelers, a dome is not the way to do it.
Yurts: The Budget-Conscious Middle Ground
Yurts offer a lower entry price and a more traditional feel, but the fabric walls are a real consideration. They provide less insulation against the wind that rolls off the Gulf of St. Lawrence, and sound travels more easily. A well-built yurt with a wood stove can be cozy, but it demands more attention to the weather forecast than a dome does.
The trade-offs: You are more exposed to the elements, and you need to check whether the yurt has a private bathroom or a shared facility. Many yurts are positioned as ‘rustic luxury,’ which can mean a longer walk to the washroom at night. If that matters to you, read the property description carefully.
Wilderness Resorts: The Minimal-Effort Option
Wilderness resorts bundle dining, guided activities, and housekeeping into one rate. This suits travelers who want to arrive with no plan and let the staff handle logistics. The trade-off is cost and seclusion, you are sharing the experience with more guests, and the per-night rate reflects the added services.
The trade-offs: Less privacy and a higher bill. You are also tied to the resort’s schedule for meals and activities, which can feel restrictive if you prefer spontaneous exploration.
Side-by-Side Comparison
Feature | Geodome | Yurt | Wilderness Resort |
|---|---|---|---|
Typical privacy | High, units spaced apart | Moderate, fabric walls | Low, shared common areas |
Climate control | Active heating/cooling | Passive insulation, wood stove | Full HVAC |
Bathroom | Private ensuite common | Shared or private, verify | Private |
Kitchen | Kitchenette in-unit | Often none | On-site restaurant |
Booking lead time | Longest, fills months ahead | Moderate | Moderate |
Vehicle access | Paved or gravel drive | Gravel road possible | Paved, bus-friendly |
Best for | Couples, photographers | Budget travelers, traditionalists | Families, first-timers |
The Value-for-Money Question
‘Value’ depends on what you would otherwise spend. A yurt at a lower rate is not a bargain if you have to pay extra for kayak rentals or drive 20 minutes to a restaurant. A dome with a kitchenette and complimentary watercraft eliminates those add-on costs. When comparing rates, add up the cost of meals, activities, and equipment rentals at each property to get a true nightly figure. The most expensive listing is not always the priciest stay once you factor in what is included.
Vehicle and Road Access
Not every property is reachable in a low-clearance sports car. The Cabot Trail itself is paved, but the access roads to individual properties vary. Some are on gravel drives that are fine in a sedan, while others require a vehicle with higher clearance, especially after heavy rain. Ask the property directly about the last kilometer of road before you book. This is a detail that rarely appears in listings and causes the most last-minute stress.
What to Ignore: Common Glamping Bad Advice
A fair amount of glamping advice comes from people who have never actually stayed in a luxury dome. The most persistent myth is that a dome is essentially a fancy tent that will be cold at night, which ignores the reality of modern climate control systems that maintain comfortable temperatures even in shoulder seasons. Another common piece of bad advice is to pack as if for a backcountry camping trip, which leads to hauling sleeping bags and camp stoves that a well-equipped property already provides.
The advice to book the cheapest available option also deserves skepticism. Pricing reflects real differences in construction quality, insulation, and amenities, and the lowest rate often means shared bathrooms or minimal heating. Read the fine print about cancellation policies before booking, and confirm whether the property stands behind its product with reasonable flexibility. A property that has operated at capacity for years and maintains a strong reputation is a safer bet than a newer operation with limited guest feedback.
Your Glamping Packing Checklist for Cape Breton
This checklist covers the essentials without overpacking, tailored to a glamping stay where the property provides the heavy gear.
- Layered clothing: base layer, mid layer, waterproof outer shell
- Warm socks and comfortable hiking footwear
- Reusable water bottle and travel mug
- Headlamp or small flashlight for evening walks
- Personal toiletries and any medications
- Camera or phone with a good landscape lens
- Light daypack for hiking and scenic drives
- Snacks and beverages for the drive to the property
- Swimsuit if the property has a hot tub or beach access
- Bug repellent for evening hours near the water
Leave behind sleeping bags, pillows, towels, and cooking equipment, since most luxury glamping properties supply these items. Checking the property’s amenity list before packing prevents both overpacking and last-minute surprises.
Conclusion: Book Your Waterfront Geodome Escape
The best glamping near Cabot Trail combines the right accommodation type, a realistic itinerary, and a packing list that matches the property’s amenities. Start with the booking early, confirm the details that matter for comfort and privacy, and choose a property that includes the activities you actually want to try. Northeast Cove Geodomes offers four private, waterfront domes in Mabou with climate control, private ensuites, and complimentary kayaks, paddleboards, and bikes, making it a strong fit for couples and adventure travelers alike. Book now to secure a dates that work with your Cabot Trail road trip, and experience the difference between camping and a true wilderness stay.
Frequently Asked Questions
How many days should you take to do the Cabot Trail?
Plan at least 3 to 5 days to drive the Cabot Trail without rushing. A 3-day itinerary lets you cover the full loop with key stops at Cape Breton Highlands National Park, Pleasant Bay, and Ingonish. With 5 days, you can add side trips, hiking trails, and kayaking sessions. Staying at a glamping site like a geodome near Mabou makes a convenient base for splitting the drive into relaxed segments rather than long daily hauls.
What should I pack for a luxury glamping experience in Cape Breton?
Pack layers even in summer, since coastal evenings turn cool. Bring a warm jacket, waterproof footwear, and hiking clothes. For the geodome itself, you only need personal items: your own toiletries, comfortable sleepwear, and any favorite snacks. Quality glamping sites provide hotel linens, kitchen equipment, and climate control. Add a camera for panoramic views, binoculars for wildlife, and a daypack for kayaking or paddleboarding excursions.
Are there specific seasons when glamping sites are open in this region?
Many glamping sites near the Cabot Trail operate from late spring through fall, roughly May to October. The best time to visit Cabot Trail for glamping is typically June through September, when temperatures are mild and all activities are accessible. Shoulder seasons like May and October offer fewer crowds but cooler nights. Always confirm seasonal booking availability directly with your chosen site, since some premium geodomes extend their season based on demand and weather.
What are the downsides to glamping?
Glamping costs more than traditional camping because you get real beds, private bathrooms, and climate control. You also trade some hotel conveniences: no room service, limited storage, and a more remote location. Privacy varies by site, so ask about geodome spacing before booking. However, for travelers wanting a wilderness stay without sacrificing comfort, these trade-offs deliver a memorable coastal getaway that standard hotels can’t match.


